Monday, April 28, 2014

A New and Improved Way to Hang Things

We had a cold, rainy weekend here in the mountaintops, so the hubby and I decided to finish painting the basement. I'm not ready to reveal the full project yet, but it's coming along! The day included painting the stairwell leading down to the basement, and so today I decided to hang a few things up.

I came up with a way to hang things -- and it's even better than the wax paper trick! I mean, the wax paper is great and all, but you have to fight it. The wax paper and the tape don't get along. It can get too heavy to tape to the wall. You see? Problems. I don't have time for that kind of drama.

The solution? Drum roll, please... Glad Press 'n Seal!

http://www.randomthoughtsofuncommonsense.blogspot.com
This stuff sticks to everything - and not in a so-messy-you-have-to-know-yoga-to-make-it-work kind of way, either! It is, however, difficult to get your camera to focus just right on the crinkly stuff. All you have to do is line up the straight edge of the press 'n seal with the edge of the backside of the frame or whatever you're hanging, and cover the nail holes. Use a Sharpie to mark the nail holes.

http://www.randomthoughtsofuncommonsense.blogspot.com
 Next, stick the Press 'n Seal to the wall where you want to hang your item. You can use a level to make sure it's nice and straight.
http://www.randomthoughtsofuncommonsense.blogspot.com

http://www.randomthoughtsofuncommonsense.blogspot.com
 Pound those nails into the marks you made, then remove the Press 'n Seal.
http://www.randomthoughtsofuncommonsense.blogspot.com
 Hang up your frame, or in my case, your magnet board, and voila! Easy Peasy. The stair railings, by the way, are in the garage because the husband decided he wanted to strip the paint and stain them. I wished him well in his endeavors.
http://www.randomthoughtsofuncommonsense.blogspot.com
 And now you've had a sneak peak of what's happening, er, down under! The green paint is really cheerful and brightens things up. It's called Celery by Sherwin Williams. Only, when they mixed it up for me, I thought it was a little too... celery-ish. So we played with it until it was toned down a bit.
http://www.randomthoughtsofuncommonsense.blogspot.com
Yeah, this stuff is pretty much the bomb-diggity.

Wednesday, April 2, 2014

Dollar Store Jewelry Holder

Hi Friends! Have you noticed all of the Dollar Store crafts and tips on Pinterest? I decided to come up with one of my own. Yes! I had an original idea. Tomorrow I'll probably find ten other blogs where people have done the same thing, but for now, I'll claim it as my very own.

The Dollar Store has some treasures, my friends. Why just today, I bought a toothbrush, a bag of plastic spoons, some nail wraps, and these:

http://randomthoughtsofuncommonsense.com
Candle holders! (Not the glue). But, these are all the supplies you will need for this quick and easy little craft.

http://randomthoughtsofuncommonsense.com
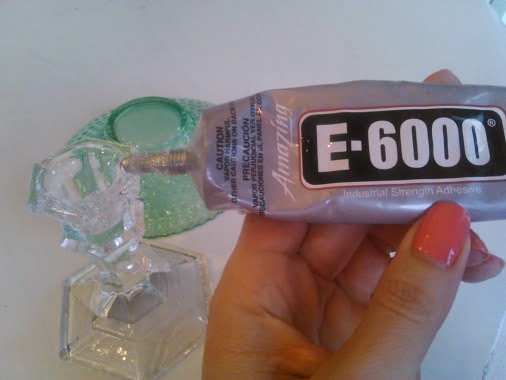
Squirt some of that E-6000 around the rim of the candlestick. I have friend who often describes things as being the bomb dot com. E-6000 IS the bomb dot com! It's perfect for gluing non-porous things together and not nearly as messy as super glue. Plus, the excess rub right off when it dries.
http://randomthoughtsofuncommonsense.com

Stick it to the bottom of the little candle dish. It's going to take a while to dry, but when it does, you'll end up with this:

http://randomthoughtsofuncommonsense.com
Isn't that a cute little jewelry holder? I made this one waaaay back, and the E-6000 holds so strong, you'd never think these were two separate pieces before.

It stands on my dresser and holds my blingy little bracelets.

http://randomthoughtsofuncommonsense.com
I'm not sure what I'll do with this one yet. Maybe I'll leave it on the kitchen windowsill to hold my rings when I'm washing dishes or cooking. Maybe it will make a cute candy dish for Easter! I think this craft would be fun to do with young girls as a Mother's Day gift. What do you think?

Thursday, March 20, 2014

Happy Spring!

Goodbye, Winter!
Today is the first day of Spring! Woohoo! In honor of this special day, I decided to go sockless and I thought I would tell you about my garden (to be).

I have never gardened in Utah, and according to everyone I know, we have a short growing season. I'm gathering the supplies I need to do a square foot garden within a raised bed. In the meantime, I started some seeds indoors. It was only 19 degrees outside last night, so the seedlings will be staying in the house for a while yet.

Don't they look adorable, sitting there in my sunny window?

http://www.housenumberthree.blogspot.com
 I've got peas, carrots, beets, heirloom tomatoes, and a few different types of lettuce going.
http://www.housenumberthree.blogspot.com
 The ones under plastic were just planted yesterday (heirloom cherry tomatoes and heirloom carrots). The plastic wrap creates a little greenhouse effect to keep them warm and encourage germination.
http://www.housenumberthree.blogspot.com
 Speaking of germination, when I was a kid, I thought "germination" sounded like a bad word, so I giggled a little every time I had to use it. I almost didn't make it through my 6th grade science fair project!
http://www.housenumberthree.blogspot.com
 Don't you love how they stretch and reach toward the sun? I feel exactly the same way. Give me some sunshine and I am one happy girl.
http://www.housenumberthree.blogspot.com
Starting seeds indoors is pretty simple. I bought a bag of soil specially formulated for starting seeds. Keep them moist and keep them warm. They'll start to germinate (hee hee) within a few days. I ordered some heirloom seeds from Amazon.com, and they should be arriving within the next week. I'm planning to have a 4ft. square bed, and I'll post when I get it built.

I'm looking forward to the warm weather to come, and I'm especially looking forward to enjoying fresh veggies all summer! Happy Spring!

Monday, February 17, 2014

"Good Enough" Burlap Shades

Oh, there you are.
I mean, here I am!

I know, it has been MONTHS since I last posted anything. Here at House Number Three, we've been dealing with three straight months of sickness. The kind of sickness that required hospital visits and trips to specialists, and sleepless, worrisome nights. Everything-else-takes-a-back-seat sickness. But we're over it. I hope. We're breathing a little easier, and getting more sleep.

And then the holidays were thrown in there, somewhere. Before I knew it, the hubs and I spent our Valentine's Day schlepping kids around to THEIR activities, while we shared a shake at the local diner.

But then today, I did a project. I made something, and it felt good! I even managed to take some pictures, and I just couldn't wait to share it with you all!

Somewhere during the holidays, we kinda-sorta started putting our basement together. We patched a damaged wall, painted most of it, bought a sectional, and had Santa deliver a ping pong table. We love to travel, so I decided to decorate it with pictures of the places we've been and give the whole room a travel theme. I'm still working on it, so that's for a later post.

In the meantime, I had three windows to dress. They're your typical, ugly basement windows with no view at all, except for some metal window wells.
I thought about doing bamboo roman shades, but they were more money than I wanted to pay for a room where raucous teens and tweens would be spending their time. I went to Ikea, hoping to find a solution, but none appeared, so I had just kind of given up, thinking that something would pop into my mind eventually.

Then, last week, my sister-in-law, Charlotte, had a curtain project of her own that went horribly awry. Let's just say she now needs both a new vacuum cleaner and a dryer. But she also had a huge bolt of burlap that she no longer wanted!

TA-DA! An idea popped: burlap roman shades!

I mostly work under the motto of "Eh, it's good enough." And when you're working with burlap, that's a good working motto. First of all, I lucked out, because the width of the bolt was exactly the length of my windows, so there wasn't a lot of cutting or measuring that I had to do. Second of all, I read a few blog posts on working with burlap. If you're looking for perfectly straight hems, or even some sewing at all, this is not the project for you. But, if you're looking for a quick, easy, inexpensive way to cover some windows that require nothing more than a glue gun and some scissors, read on!

First of all, gather the materials: burlap, jute twine, scissors, and a glue gun. Measure your windows and cut the burlap to fit. I learned a really cool trick for cutting burlap: pull a string/fiber out from where you want to cut. It will leave you with a nice, straight cutting guide.
Once the burlap is cut, fold down the top to make a pocket for your rod. I used $3.00 tension rods from Walmart.
Ignore the cruddiness of my glue gun. It's probably 20 years old, but still does the job! Be careful not to burn yourself with the hot glue as you press down the edge. Again, I just sort of eyeballed it as I folded and pressed. Once you've done that, slide the tension rod through the pocket and hang it up.

Finally, take some jute twine (purchased at Walmart in the hardware department for less than $2.00) and run it over the top of the rod.

Seriously, I didn't even bother to tack it to the burlap at all. It's just hanging there. TA-DA! In about an hour, I had three burlap shades hanging in the basement.
Burlap Shades
Roll the burlap shade up to the desired length, then tie off with the jute.
burlap shades


I love how they allow the light to filter through, while covering up those unsightly window wells. Now if I could just get the kids to put the ping pong paddles away.
burlap shades
Burlap is all the rage right now, and I like that it's heavier, so it makes a good shade-type material. Don't try to fight it. Just let the burlap do what it's going to do and I think you'll have success with your project.

So there you have it! No-sew burlap shades that are, eh, good enough!

Saturday, November 16, 2013

Whimsical Fall Decor

It might be snowing here at House Number 3 today, but the calendar still says it's fall. I thought I'd share something small today. If you're looking to add a touch of whimsey to your fall decor, here's one idea:

Aimee (Amos, as I call her) came up from Arizona a while back, and brought me these darling mercury glass pillar holders. She knows I like sparkly things! I didn't have any pillar candles on hand, and I didn't want to wait to get some before I used these darling candle holders. I did happen to have a few mini pumpkins sitting in my kitchen, so vĂ³ila, problem solved!

whimsical fall decor
 I think they're cute and whimsical, and definitely something a little different.
whimsical fall decor

whimsical fall decor
 I even added a short one to the mantel.

I love finding new and unique uses for different objects. Besides that, it was simple! And now that it's snowing, their cheerful color adds some contrast to all that white stuff outside!

Monday, November 11, 2013

Thanksgiving Dining Room

Hey Friends! The last few days here in the mountaintops have been absolutely spectacular. It has been sunny and cool, with temps reaching about sixty. In November, we'll take it! In fact, as I look out the window right now, the park is full of people out enjoying the weather. And, as I typed that sentence, my son hit the front door with his Frisbee! Life is good up in here!

 I decorated my dining room for Thanksgiving the other day. I've never had a house with a formal dining room before, so I was very excited to make it pretty for fall! The only thing missing is a rug, but that is something that will come later. For now, I'm pretty happy with how it turned out!


The first thing I did was to sew myself up a new tablecloth. I am so in love with shades of aqua and turquoise recently. I just love how the fabric plays off of the curtain colors, too. Isn't it pretty? I picked up the fabric from a red-tag bolt at JoAnn Fabrics. I don't think I paid more than 7 or 8 dollars for it. I pressed the ends and hemmed around the edges with a zig-zag stitch.
DIY tablecloth


 I've had this metal pumpkin for YEARS. Years, I tell you. I think I bought it for House Number One. Every Fall, I take it out of storage, and it ends up somewhere different every time. I decided it would make a pretty centerpiece this year, and so there it sits, atop the Lazy Susan.


This little vignette sits on top of the little cabinet where I keep my collection of Delft Blue pieces. (I'll talk about that another day). The platter came from one of my favorite places for home decor here in Utah: Tai Pan Trading. They have everything there you can imagine, and the platter was only $5.00! If you don't live in Utah, I know I've seen similar platters at WalMart. The little vase is something my husband picked up in Japan when he was a young Mormon missionary there. He brought it home and gave it to his grandmother. When she died, the vase came home to us.
Thanksgiving Vignette


Here are the little pilgrims and turkey standing guard at the side table.


I made this cute banner from a tutorial I found on Pinterest. I'll save that for another post, though. It's made from Chalk Cloth by Moda. I love that you can use it over and over again. All you need is chalk! The "Happy Fall Y'All" is an homage to our friends and family back in Texas.
Chalk Cloth Banner


Here it is, hanging on my mantel last month.


I'm so excited about Thanksgiving. It's a time to express gratitude for everything I have. I hope that I can remember to express those feelings throughout the year, and not just in November. This year I'm especially grateful for a beautiful new home!
Thanksgiving Dining Room
Happy Fall, Y'All.

Monday, October 28, 2013

Happy Fall, Y'All!

Fall is here, and I have to say it's my second-favorite season, behind summer. And it's a distant second. However, I do love the vibrant hues of orange and red and yellow. This year, I decided to make a new fall wreath for my front door. The flowers on the old wreath? Not so vibrant anymore. I took them off the old grapevine wreath and replaced them with some pretty new ones from JoAnn. I think they add a nice splash of color against my mostly brown house. I chose ranunculus, pom-pom chrysanthamums, and lantern blossoms. They're all wrapped up with a sparkly new bow.

What do you think?

www.housenumberthree.blogspot.com


Making a wreath can be as simple or as intricate as you want it to be. I ALWAYS opt for simple. Less is more, wouldn't you say? For this wreath, I "mapped" out where I wanted the flowers to go. Then I simply used wire cutters to cut the flowers down to the desired length. Then I stuck 'em in, wedging them between the twigs of the grapevine. Finally, I made the bow and used a twist tie from a bread sack to attach it to the wreath. Easy Peasy! The wind has been blowing all day today, and to quote Bill Murray in Ghostbusters, "The flowers are still standing!"

Happy Fall, Y'All!