Showing posts with label light fixtures. Show all posts

Thursday, May 15, 2014

Nailed It!

Do you know what I love best about House No. 3? 

Nails.

Yep. It's all mine, and I can pound nails into the walls without thinking twice about it. See, we were renters for five years, and even though some of my things hung on the walls, the walls were not my own. 

I'll admit that after all the hard work of painting the walls of House No. 3, it took me a while to work up the guts to stick a nail in the sheet rock. But I am long over it, which brings me to today's project.

We've been working on the basement, and in the middle of it, the bathroom got flooded by the washing machine up above. I know, right? Distractions, distractions. HOWEVER, today I decided not to let a silly little thing like a flooded bathroom get to me, and I refocused on one little corner of the basement, which I like to refer to as Down Under. I've mentioned before that it's being decorated in a travel theme, so Down Under seems a fitting name.

My mother-in-law gave me a big, round basket for Christmas. At first I thought it might look good on an ottoman or tabletop where it could catch stuff. But we don't have either of those things Down Under, so then I decided it would look great hanging on a wall! It seemed kind of lonely up there, so yesterday, I took a trip to our local thrift store to find it some friends to hang out with. And wouldn't you know, I found THREE baskets for 50 cents each! FIFTY CENTS!

Here's what I ended up with:
http://housenumberthree.blogspot.com
They were easy to hang, too. I just pounded those babies to the wall, using nothing but small wire nails.
http://housenumberthree.blogspot.com
The big basket took two nails, while the smaller baskets each took one nail.

http://housenumberthree.blogspot.com
Don't you love how they fit right in to a world traveling theme? The globes and the clock add to it, as well. I like the miniature spotlight, too. I found that at Lowes. When my kids have friends over for movie night, the rule is that one light must be on at all times. This was a good solution.
http://housenumberthree.blogspot.com
The best part is, this little project was SUPER cheap and I didn't have to go through TSA to complete it!

Wednesday, April 30, 2014

Make It Yours

My sister-in-law's last name is Swan. The very first time I ever went to her house, I noticed she had several cute little swan-related decorations, from ceramic knick-knacks to a beautiful painting. It was brilliant, I thought, that she could use her name to help her family feel connected to their home and surroundings.

And then I married her brother, and took on the last name of Stagg, and well, nobody gave us any antlered knick-knacks for our wedding.

Then, even before we ever moved into House No. 3, I decided the first things that had to go were these:

http://www.housenumberthree.blogspot.com

There were two of these babies on either side of the fireplace. And while I wanted my little family of Staggs to feel connected to our new home, this just wasn't the way to go. I mean, what is that creepy little claw-like antler thing coming out of the bottom of the fixture?

So the antler lights were replaced with non-Stagg fixtures, which left me on the hunt for something else to represent our name. I thought about something like this:


But I was afraid some psychopathic villain with bad hair might show up in a helicopter and burn my house down. So that was out. (However if a handsome British spy showed up in a vintage Aston Martin, that wouldn't be so bad, would it?)

Then one day, while perusing through the online garage sale for our community, a print caught my eye. I raced right over the the seller's house and gave her a whopping $4.00 for it. Then I raced over to Michael's and put it in a frame. And then I raced over to my friend's house, who helped me cut out a sign.

Here's the end result:

http://housenumberthree.blogspot.com


http://housenumberthree.blogspot.com

It fits right in with the rest of our stuff. My husband is especially proud to have it hanging there, and the kids love it, too. I firmly believe that a home should represent the people who live within its walls. Whether it's a collection of photographs on display or the kids' artwork on the refrigerator, people should feel connected to their surroundings. It's what makes a house a home and what makes a home a haven.
What have you done to make it YOURS?

Monday, June 10, 2013

Mantel (Pin)spiration

House No. 3 has a really cool mantel. When we first saw the house, I got really excited for all the possibilities this mantel held. I immediately started pinning ideas, and this was one of my favorites:


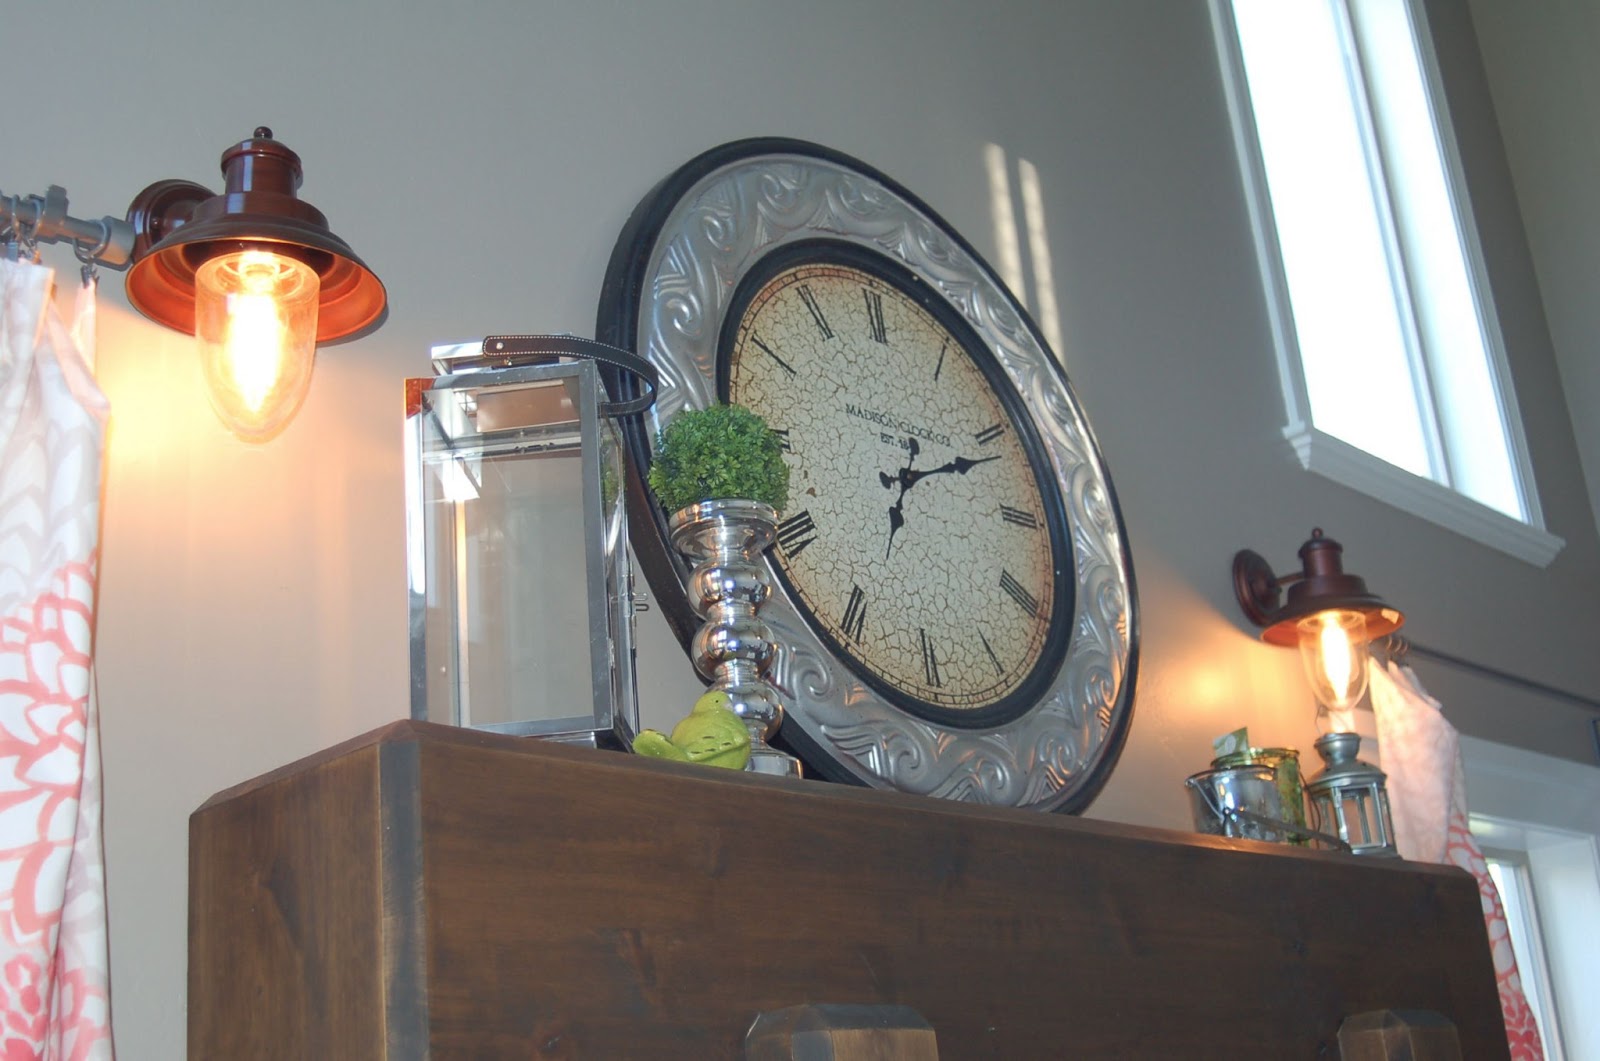
I liked the idea of continuing the lantern look on the mantel, and I wanted to give it a vintage-like feel. That meant the antler sconces had to go. If your tastes lean more toward the cabin-like, rustic kind of decor, I find nothing wrong with that. I think, like all decor, it can be well done. But what the heck is up with those creepy little claw-like things coming out of the bottom? Are the antlers trying to escape? I'll be honest, they kind of terrified everyone of us. You can click on the picture to really see the detail!

I found some great sconces on clearance at Lowes (huzzah)! They perfectly fit the vintage feel I was going for, what with those awesome old-fashioned Edison light bulbs and all. I really like the way they frame in the mantel and its contents. And then I thought, what's more vintage than mercury glass and other shiny, silvery things? So I took a few things I already had and got to work. I've had that giant clock for years. It was gold in House No. 1, then I spray painted it red for House No. 2, and now silver for House No. 3. The verdict is still out as to whether I really love it or not. I'm toying with the idea of spray painting it a matte turquoise, but for now, it will remain silver. What do you think?

So that's my pinterest-inspired project for this week. Thanks for stopping by!


Wednesday, June 5, 2013

DIY Lantern Lights

I'm in love with lanterns. I think they add a unique look to a room. House No. 3 definitely had some unique light fixtures when we bought it. Antler sconces, ceiling fans the size of cargo plane propellers... not exactly my style. We have a room that is supposed to be a formal dining/living room. However, our family needed it to be a formal dining/office. While these are two very different rooms, the room itself is actually one very long room. I figured the best way to tie them together would be to hang matching lantern light fixtures. I searched and searched, and pinned lots of lanterns. The problem was, all the lanterns I loved were at least $300. Ouch! I wondered to myself if I could simply make my own, and with a little help from Google, the answer was, "YES!" Honestly, how did we survive before the internet?

Here's what I did: I bought two of these decorative lanterns at T.J. Maxx for $20.00 each.
Then, I ordered two of these light fixtures from lightingdirect.com for $16.00 each. (They had a coupon for 10% off and free shipping)!
I took them apart and spray painted the electrical part and the mounting pieces with Krylon paint+primer.

Then, I had my hubby drill a hole in the tops of the decorative lanterns for the wires and put them all together.
Finally, we hung them (with a little elbow grease)!
Here is a "before" shot of the room (notice the ceiling fan was much too large to even fit in the picture)! And yes, that's yellow paint with tan trim.
And here is an "after" shot, with the two lanterns tying it all together:
Aren't they gorgeous?

So the breakdown goes like this: $20.00 for each T.J. Maxx lantern. $16.00 for each brass light. $4.00 for the spray paint. That's a grand total of $40.00 per light fixture!

I love the feel they add to the room. They are definitely unique, and when people ask me where I got them, I love being able to say, "I made them myself!"