Thursday, July 18, 2013

How To Paint a Door

Between the first and second floors of House No. 3, I have painted 12 doors so far! Pantry doors, laundry room doors, bedroom doors...doors, doors, doors!

With all of those doors, I have developed a technique that works for me. Some people like to remove the doors from the hinges, drive nails into the tops and bottoms, and use saw horses in the garage to paint them. I don't have that kind of time, patience, or space, so I leave the doors hanging right where they are. I usually end up painting 2 doors at a time. I paint the first coat on one door and then, while it's drying, I paint the first coat on the second door. Then, while that's drying, I put a second coat on the first door. You get the idea.

First, gather your supplies: you'll need a good brush (I can't stress the importance of a good-quality brush)! You'll also need tape, a smooth-surface roller, a paint tray, painter's plastic (to protect the floor) and of course, paint! I used semi-gloss.
My husband had already painted the trim, so then it was my turn to tackle the doors. Tape off the hinges and knobs.
housenumberthree.blogspot.com
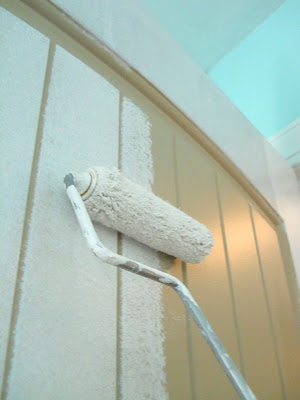
I like to start out by painting the sides, rolling the paint on straight up and down.
Then I cover the horizontal parts.
housenumberthree.blogspot.com
Next, I move on to the middle of the door.
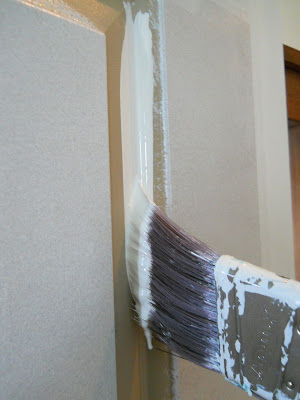
Take your brush and get into the grooves! I've found that if you really load it up with paint (not quite dripping -- but almost) you can get a really smooth look. Pull the brush straight down in one long stroke. If you run out of paint before you run out of door, reload and start about an inch above where you ran out. When I do it this way, I avoid brush/bristle marks in the paint.
housenumberthree.blogspot.com
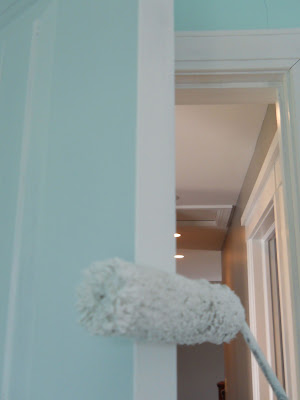
Don't forget the sides! Keep a damp cloth handy to wipe off the hardware if you get paint on it -- and I always do! Once the first coat dries, go back and add a second coat.
housenumberthree.blogspot.com
I learned a neat little trick from the guys at the paint store. If you're done painting for the time being, simply wrap your roller and paint brush in plastic wrap. This is a great little time saver! It always takes me a good 10 minutes to wash everything out, so by doing this, I'm saving time and paint. When I unwrap them, they're good to go again. I've left them like this for as long as 24 hours and didn't have a problem.
Once you're all done, stand back and admire your handiwork!
housenumberthree.blogspot.com
The first door I did took me a few hours -- I'm a bit of perfectionist when it comes to painting. But once I got my own little system worked out, I cut that time significantly! Waiting for the coats to dry is the most time-consuming part, which is why I paint two doors at a time.

There are lots of ways and techniques on how to paint doors out there, but I hope you'll find this one somewhat useful! Let me know how it works out for you!

Wednesday, July 10, 2013

Homemade Salsa

One of  my favorite summertime (or anytime) snacks is chips and salsa. I especially love homemade salsa made with fresh tomatoes and cilantro! I'm sure there are as many versions of homemade salsa out there as there are fireworks for the Fourth of July. This is one I've made up over the years. It's really easy and so refreshing! By the way, I like chopping up everything by hand. I know you can make quicker work of it by using a food processor, but I prefer the way it all turns out hand-chopped.

First, dice up 3-4 fresh tomatoes. 

 Then, add  in 1/2 of a small onion, diced. If they're available, the Vidalia sweet onions are the best!

 Squeeze in the juice of one lime.
Add in some salt and garlic powder to taste. 

 Chop up a bunch of cilantro. Chop up a green chile (I forgot to snap a picture of that part).
Stir it up and enjoy!
housenumberthree.blogspot.com

Monday, July 8, 2013

Pinterest Monday: DIY Welcome Sign

Hi Everybody! I hope your Fourth was as fun as mine! I got to see my daughter perform in The Music Man, we spent time with friends and family, and we ate lots of good food! The highlight for me was celebrating our first Fourth at House No. 3! Is that a mouthful or what? Our back patio offers the perfect view for all the fireworks displays in the valley where we live, so the hubby and I pulled up some deck chairs, cuddled up under a quilt and watched the fireworks with the kids. Maybe next year I'll remember to snap a picture, but this year I was too busy enjoying the moment!

SO...It's another Pinterest Monday, and I thought I'd share something I made a while ago. I was inspired by this pin right here:


It's an easy project, as the instructions are simple to follow, and don't require a lot of tools beyond a saw and a drill. Here is what I did:
http://www.housenumberthree.blogspot.comhttp://www.housenumberthree.blogspot.com 
Yeah, I steal like an artist. I'm much better at taking an idea and making it my own, as opposed to coming up with an original idea. If you're skeptical of that philosophy, just think of all the Hollywood movie remakes out there! 
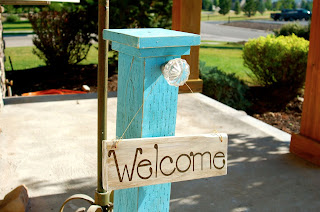
I'm really in love with all things turquoise lately. I like how it stands out, yet seems to go with everything! I added a crystal doorknob (purchased at Home Depot) instead of a hook, just to give it a little sparkle.
housenumberthree.blogspot.com 
Above, you can see I spent some time distressing the paint with a little sandpaper. I slapped some green over the turquoise and then sanded it off to give it a really aged look. The fence post I used came with all those little marks already made -- I think they really add some character!

House No. 3
House No. 3
I was so pleased with the way it turned out, I made one for my mother-in-law for her birthday last year. So there it is. I hope this inspires you to take a project and make it your own! Remember, just steal like an artist!

Monday, July 1, 2013

A Patriotic Pinterest Monday

Hello, Everybody! If I haven't told you before, summertime is my absolute favorite! Sunshine, watermelon, and flip-flops -- what's not to love? With the Fourth of July coming up this week, I thought I'd share a pin in honor of the holiday.

And here is what it looks like after I printed it:

I printed them on regular, plain white paper and stuck them in frames from the dollar store. How nice of Martta over at HMH designs to offer these cute printables for FREE! What a quick, easy, and affordable way to add a little patriotic pride to your house this week! I will definitely have these on display in House No. 3 this week! Happy Independence Day!